If you are a caseworker for contracts you can read about how to process or create work assignment contracts here.
Step 1 – Who
Step 1 is the same for all types of contracts. Read more about step 1.
Step 2 – Contract
In Step 2 you enter contract information and organisational affiliation. Additionally, you can change cost allocation.
If you are processing a contract proposal from an orderer, the fields for "Contract type", "Organisational unit" and "Cost allocation" will be pre-filled with the information the orderer has entered in the corresponding fields. As a caseworker for contracts, you can modify the information in all fields, including those pre-filled by the orderer.
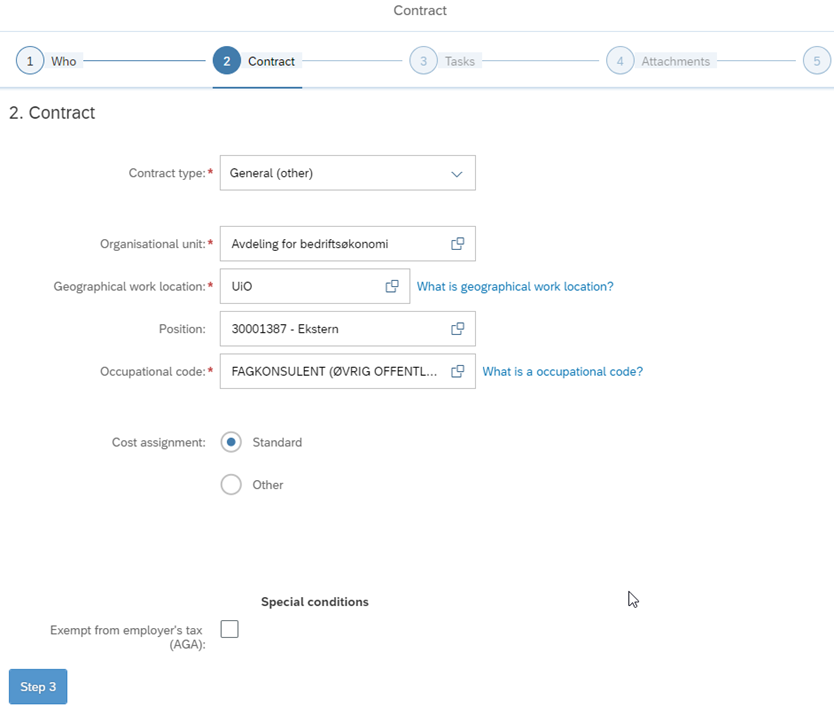
The field "Contract type" has a drop-down menu with several options. Further registration of the contract will depend on what is selected in this field.
If the orderer has registered one or more tasks when creating an assignment contract, this information will be pre-filled in Step 3. If you change the value in the "Contract type" field, any tasks registered by the orderer will disappear from Step 3. This is because tasks are dependent on and linked to the type of contract and contract type. If the orderer has registered one or more tasks and you change the value in the "Contract type" field, you will receive a warning that the change you are about to make will result in the deletion of pre-filled information in Step 3.

Clicking "Continue" will change the value in the "Contract type" field and delete the pre-filled values in Step 3. Choosing "Cancel" will not change the value in the "Contract type" field, and the pre-filled values in Step 3 will remain.
The "Organisational unit" field shows all organisational units you have access to. This field is determined by your authorisation (A290). Click the arrows to navigate the organisational chart.
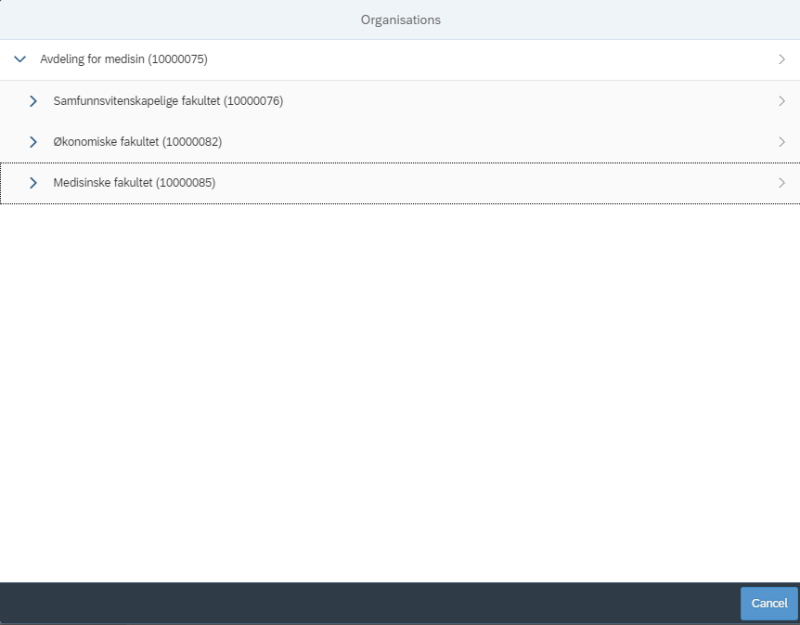
When you select an organisational unit, a list of all positions in the selected organisational unit that are active during the contract period will appear. In the "Employees" column, the number of people employed in the position is displayed.
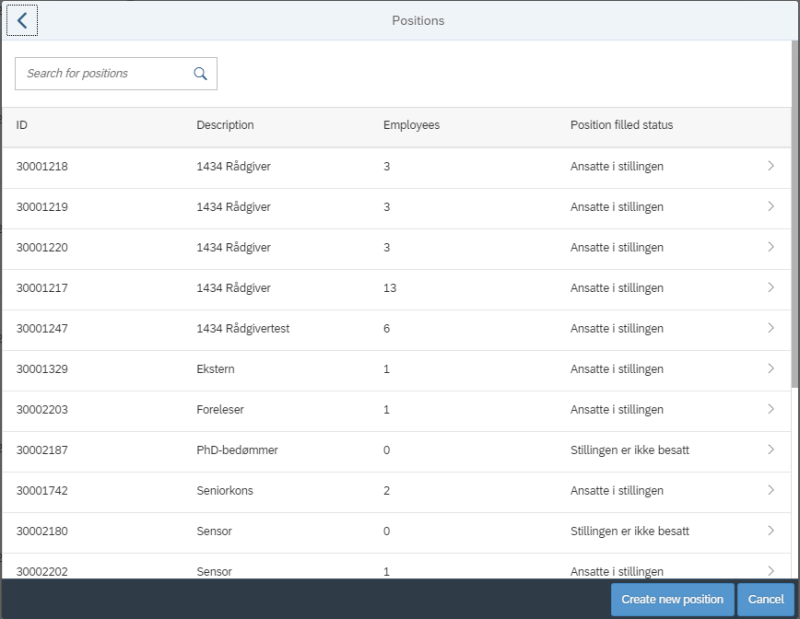
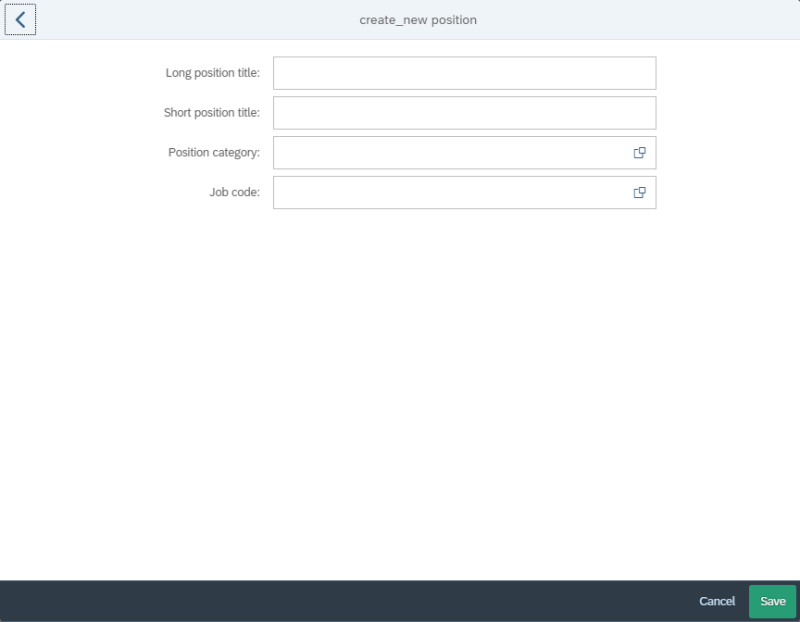
You can also create a new position by clicking the "Create new position" button. Enter the position title, position category, and job code. Click "Save" when the required fields are filled in.
The fields "Geographical work location", "Position" and "Occupational code" are updated with information from the position and organisational unit.
If the "Cost allocation" field is set to "Standard", the cost allocation from the position will be registered in the contract. This can be changed by checking "Other". The information entered in these fields will be posted in IT0027 Cost Distribution in the payroll system. Percentage cost distribution is not possible for assignment contracts.
If the contract was originally created by an orderer, and the orderer has registered a different cost allocation, the cost allocation field will be pre-filled with "Other". When you register or change the organisational unit and/or position, it will not change the cost allocation registered by the orderer. In cases where the contract is to follow the standard allocation for the selected organisational unit and/or position, you must revert the cost allocation back to standard.
However, please note that if the caseworker chooses to create a new position, the cost allocation will automatically revert to "Standard". The caseworker must manually revert to a different cost allocation if the contract is not to follow the standard cost allocation for the newly created position.
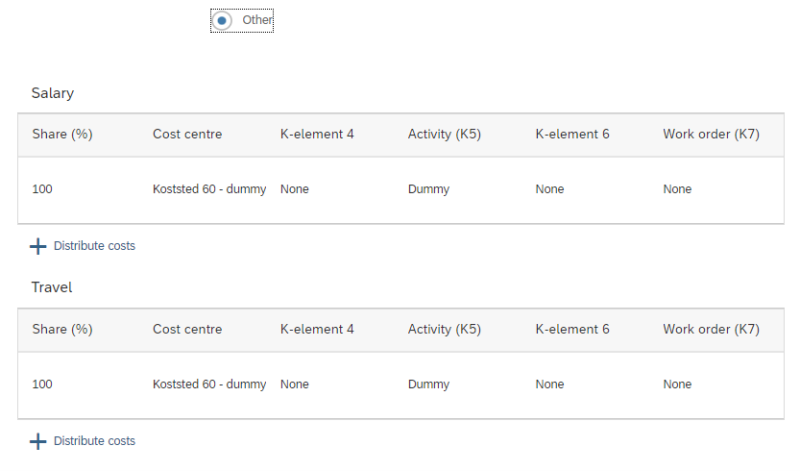
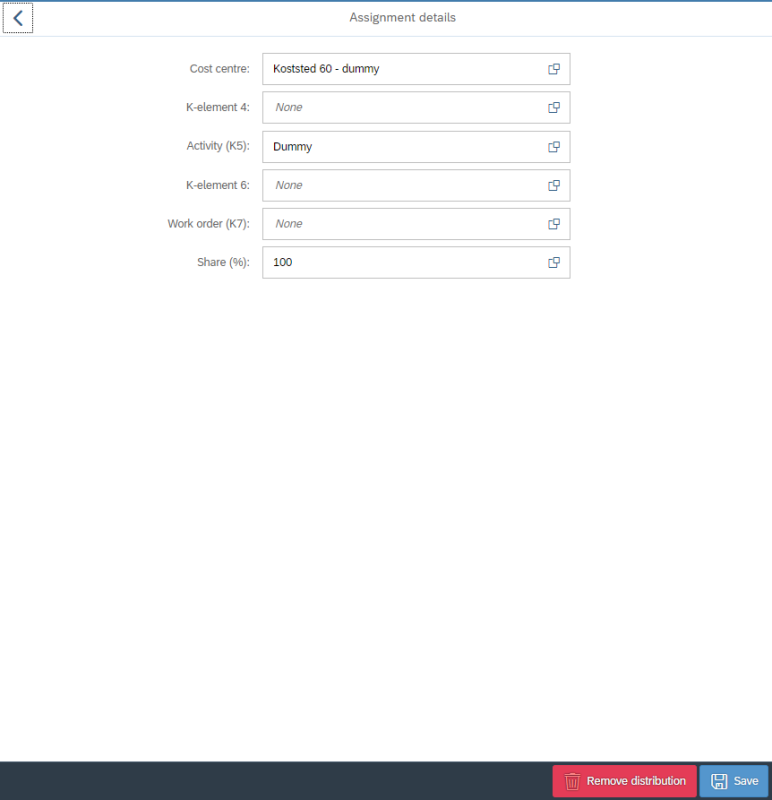
To change the cost allocation, click on the relevant line, either salary or travel. Enter the desired distribution and click the "Save" button at the bottom right. You can also delete the distribution by clicking the "Remove distribution" button. This sets the cost allocation back to standard for the selected organisational unit. To go back, click the arrow to the top left.
At the bottom of the page, under the heading "Special conditions", you can choose whether the employee should be exempt from employer’s tax (AGA). By checking this you affect which wage types are generated for the various tasks. See DFØ Brukerdokumentasjon for an overview of the variations between type of contract, contract type, task, and wage type.

When all information is registered, click the "Step 3" button at the bottom left to proceed.
Step 3 – Tasks
In this step you enter the financial framework of the contract. There is no limit to the number of tasks that can be entered, but you must register at least one. To create a task, click the "+ Add task" button.
If the orderer has registered tasks in their proposal, the table in Step 3 will be pre-filled with this information. As a caseworker for contracts, you can modify the information in all fields, including those pre-filled by the orderer.
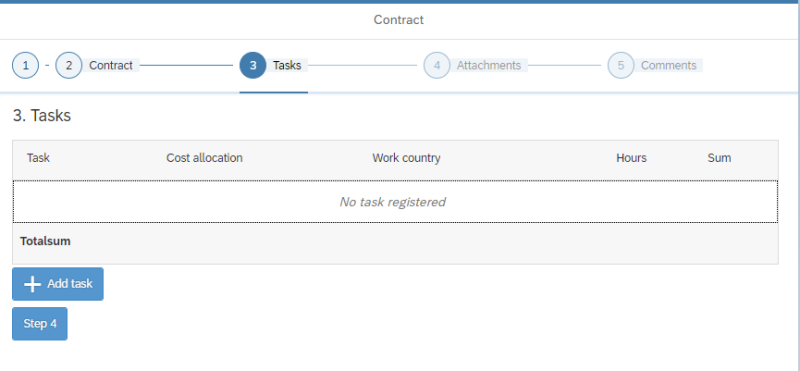
After clicking “+ Add task”, click the "Task" field to bring up a list of relevant tasks. The options that appear in the list depend on the contract type selected in "Step 2 – Contract". The task you choose determines which wage types are registered. If there is only one task available in the contract type, the field is pre-filled and cannot be changed.
Enter an amount per task. The sum of all tasks constitutes the financial framework of the contract.
It is possible to override the cost allocation for individual tasks. This only needs to be changed should the task have a different cost allocation than the rest of the contract, i.e. a deviation from what is registered in "Step 2 – Contract". It is possible to register different cost allocations for all tasks, but it is not possible to change the cost centre. The cost centre chosen in "Step 2 – Contract" determines the cost centre for the entire contract. The cost centre field will always be greyed out and non-editable.
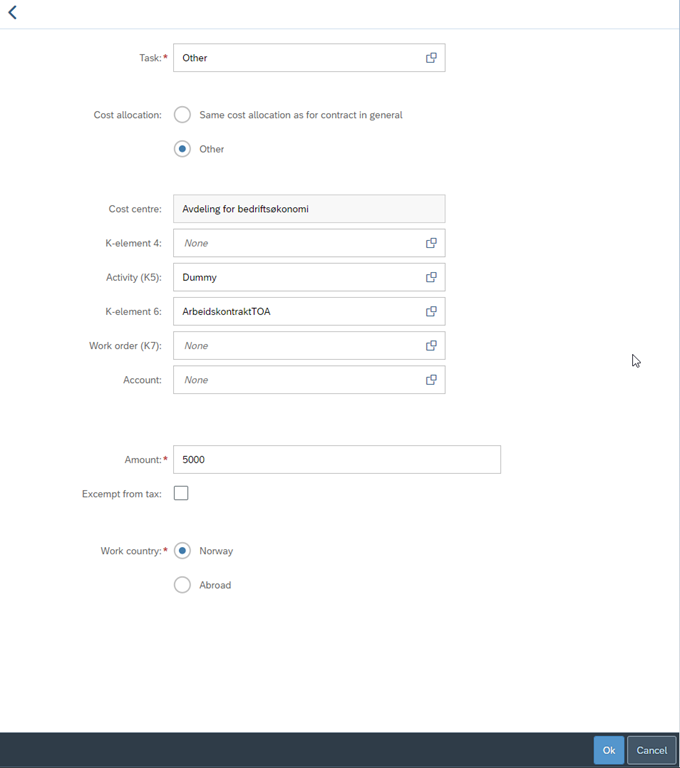
The orderer does not have access to the checkbox for "Exempt from tax". You must decide whether the task should be paid with or without tax. If you check "Exempt from tax", a wage type without tax will be generated. This function is available for all tasks in assignment contracts except "Member of boards, councils and committee".
You must also decide which country the work will be performed in. This affects the registration in SAP, which in turn affects the reporting. If you select "Abroad", a box will appear where you can select the country.
If an orderer has registered the task, the work country will be pre-filled with the choices made by the orderer in the corresponding fields.

When all information has been entered, click the "Ok" button. You can add more tasks by clicking the "+ Add task" button again. Once the financial framework has been finalised, click "Step 4" to proceed.
Step 4 – Attachments
In Step 4 you can upload attachments by clicking the "+Add attachment" button. Additionally, there is a free-text field for the contract. What you write here will be included in the actual contract that is sent for signing.
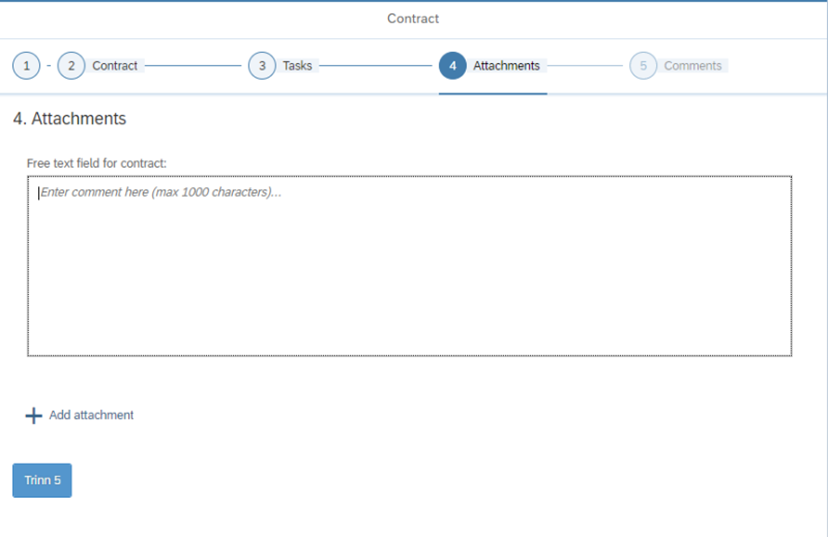
Click the "Step 5" button to proceed.
Step 5 – Comments
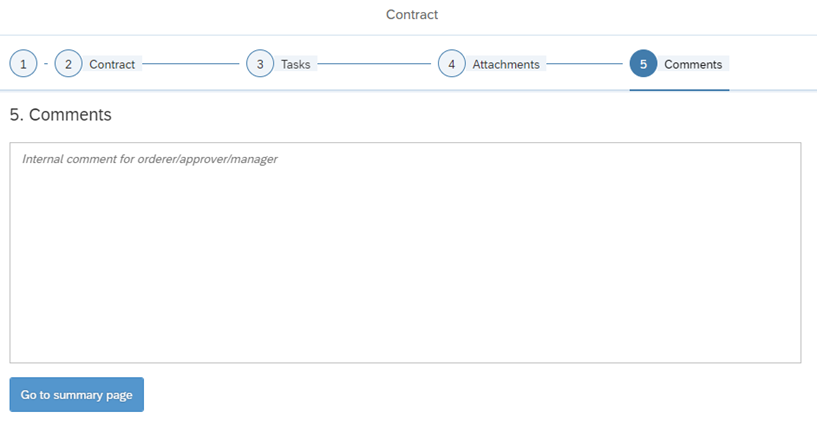
In step 5 you can leave a comment for the next processor in the workflow, the manager with budget allocation authority.
If the orderer has included an internal note in their order, it will be shown under the free-text field.
See summary page and submit
Once you have entered the necessary information in the contract, click the "Go to summary page" button in the last step. A summary of what has been registered in the various steps will then appear. If anything needs to be changed, you can click "Edit" for each step. If you click "Edit" you must search for the employee again.
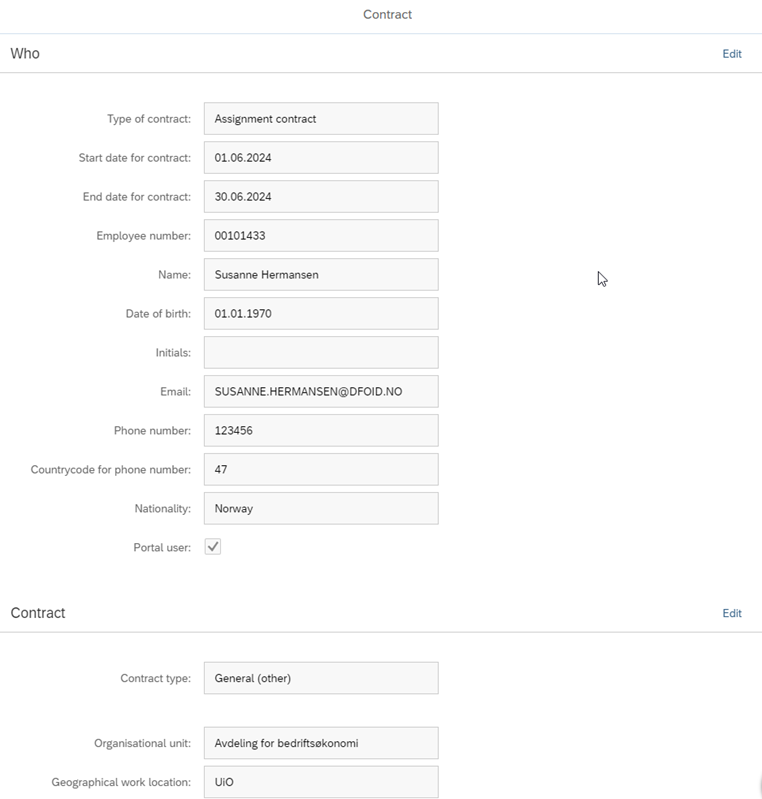
To the bottom of the summary there is a button called "Display contract". Clicking this brings up a draft of the contract that will be sent for signing after the manager approves the financial framework of the contract. It is important to review this before submitting the contract for approval.
To submit the contract, click the "Submit for approval" button to the bottom right. A confirmation box will appear, where you must click "Submit". The form will be sent to a processor with budget allocation authority.
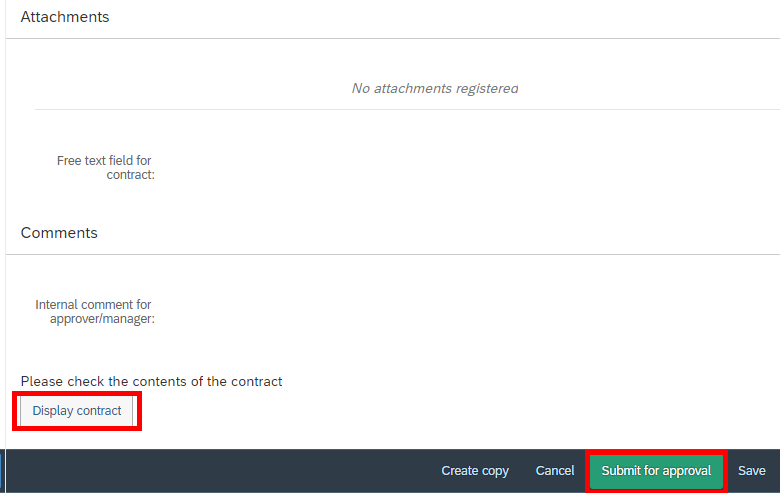
If you have created the contract without an order, you can save the draft and continue with the form later by clicking "Save". To cancel the registration, click "Cancel". You can also create a copy of the form by clicking "Create copy". It is recommended to submit the form before copying to ensure that data is not lost.
