Travel expense claim, expense reimbursement and remuneration for recipients of fees

This is how you register travel expense claims, expense reimbursements or remunerations online or in our app.

Who is this page for?

This page is for you who are not employed in the agency which is paying you the expense, travel expense claim or fee.

For example you may be

  • member of council, committee or board
  • interpreter
  • lay judge
  • exam invigilator

If you are employed in the agency you can use the self-service portal or DFØ-app.

Two self-service solutions

Betalmeg – online

Betalmeg is a self-service solution online. Use an updated web browser such as Chrome, Edge or Firefox and log in via ID-porten.

The DFØ-app – on mobile and tablet

The DFØ-app can be used to send travel expense claims, register fees and other expenses on mobile or tablet. You log inn via ID-porten. 

You log on via ID-porten

  • You can use MinID, BankID, BankID for mobile, Buypass and Commfides to log in.
  • If you have difficulties logging in via ID-porten, contact user support at the Norwegian Digitalisation Agency .

This is how you use the app

Create a travel expense claim in the app

Register a travel expense claim

  1. Press the + symbol in travel expense claim
  2. Enter date and time for travel start and travel end
  3. Enter purpose (obligatory). Select country if the trip is not in Norway. Enter place (place is visible in the list of travel expense claims).
  4. Change type of trip if applicable.
  5. Add any new destinations if applicable.
  6. Write any comment.
  7. Press reimbursements in the menu. The travel expense claim is saved as a draft.
  8. Change cost allocation if applicable.
  9. If you are entitled to subsistence allowance, press subsistence allowance. Tick the box for subsistence allowance. Tick the boxes for any meals which have been provided or paid for on your journey, and chance time if applicable. Press ok.
  10. Register any night supplement if applicable.
  11. Register any kilometre allowance if applicable.
  12. Compensation supplement is calculated automatically based on number of hours abroad.
  13. Add any expense posts (with any attachments).
  14. You can also press attachment in the menu and add attachments there.
  15. Press the icon to save (floppy disk). The travel expense claim is saved as a draft. You can continue to register the travel expense claim later.
  16. Press Send to send the travel expense claim. Press Send in.
Edit, delete, or copy a travel expense claim in the app

Edit a travel expense claim

  1. Press the travel expense claim to edit. If you have sent the travel expense claim for approval, you must press edit.
  2. Register the changes.
  3. Press the icon to save (floppy disk) to save the travel expense claim as a draft or on Send to send the travel expense claim.

Delete a travel expense claim

You can only delete travel expense claims which have not been paid out.

  1. Open the travel expense claim.
  2. Press the icon for more (three vertical dots).
  3. Press delete.
  4. Press ok. The travel expense claim is deleted.

Copy a travel expense claim

  1. Press the travel expense claim you want to copy.
  2. Press the icon for more (three vertical dots).
  3. Press create copy.
  4. Select new start date and make necessary changes to the travel expense claim.
  5. Press the icon to save (floppy disk) to save the travel expense claim as a draft or on Send if you are done and want to send it for approval and payment.
Register multiple destinations, subsistence allowance, cost allocation and expenses in the app

Add new destination

  1. Press itinerary in the menu of the travel expense claim.
  2. Press add new destination. Destination 2 is displayed in the travel expense claim.
  3. Add purpose, departure date and departure time from the previous destination, country, place, and type of trip if applicable.
  4. Repeat points 2 and 3 to add more destinations.

Register subsistence allowance

  1. Press reimbursements in the menu.
  2. Press subsistence allowance.
  3. Tick the box for subsistence allowance.
  4. Tick the boxes for any meals which have been provided or paid for on your journey, and chance time if applicable.
  5. Press ok.

Change cost allocation

  1. Press reimbursements in the menu.
  2. Press cost allocation.
  3. Press the topmost field where it says 100,00% and enter the changes. You are changing the cost allocation for the entire trip. If you are splitting the cost allocation by percentage, you must change the percentage.
  4. Press “add new cost allocation” to split the cost allocation by percentage.

It is also possible to change the cost allocation for an expense post.

Register night supplement

  1. Press reimbursements in the menu of the travel expense claim.
  2. Press night supplement.
  3. Tick the boxes for the nights you are claiming night supplement.
  4. Press ok.

Register kilometre allowance

  1. Press reimbursements in the menu of the travel expense claim.
  2. Press kilometre allowance.
  3. Press “add new mileage”.
  4. Enter information in the fields.
  5. Press ok. If adding multiple distances, press add new distance and repeat.
  6. Press ok.

Tromsø has its own rate for kilometre allowance. For Tromsø, select Country = Norge, Tromsø.

Add expense posts

  1. Press reimbursements in the menu of the travel expense claim.
  2. Press “add new expense post”.
  3. Press expense type and select expense type.
  4. Enter information in the other fields (some are obligatory, you will receive an error message if you do not enter information in these) and press ok.
  5. Add any attachments.
  6. Repeat to add more expense posts.

Delete an expense post

  1. Press the expense post you want to delete.
  2. Press the icon to delete (rubbish bin).
  3. Press ok.
Send expense reimbursement in the app

You can use expense reimbursement when you have had minor expenses, as for instance for books, parking, or bus tickets.

Register an expense reimbursement

  1. Press the + symbol in expense reimbursement.
  2. Add date and purpose (obligatory).
  3. Change cost allocation if applicable.
  4. Add one or more expense posts.
  5. Press attachment in the menu and add attachment.
  6. Press the icon to save (floppy disk). The expense reimbursement is saved as a draft. You can continue to register the expense reimbursement later.
  7. Press Send to send the expense reimbursement. Press Send in.

Delete an expense reimbursement

Expense reimbursements which have not been paid out can be deleted.

  1. Open the expense reimbursement.
  2. Press the icon for more (three vertical dots).
  3. Press delete.
  4. Press OK. The expense reimbursement is deleted.

Copy an expense reimbursement

  1. Press the expense reimbursement you want to copy.
  2. Press the icon for more (three vertical dots).
  3. Press “create copy”.
  4. Select new start date. Make other changes.
  5. Press the icon to save (floppy disk) to save the expense reimbursement as a draft or Send to send the expense reimbursement.

Adding expense posts

  1. Press “add new expense post”.
  2. Press expense type and select expense type.
  3. Enter information in the other fields (some are obligatory) and press ok.
  4. Repeat to add more expense posts.

Delete an expense post

  1. Press the expense post you want to delete.
  2. Press the icon to delete (rubbish bin).
  3. Press ok.
Send remuneration form in the app
  1. Press Register remuneration in the main menu.
  2. Press the + symbol to create a new form.
  3. Press Purpose (obligatory). Enter purpose (description of the task) and press OK.
  4. Change cost allocation if you have been informed to do so.
  5. Press + Add new remuneration (further down on the page).
    1. Press Description. Enter description (date, part of the task, etc.) and press OK.
    2. Press date and select date in the calendar.
    3. Press wage type. Search for wage (with name of number) and/or select wage type in the list.
    4. Enter amount, number or number and rate.
    5. Press OK.
  6. Repeat the last point to add more remunerations to the form.
  7. Write comment for approver/manager.
  8. Press Attachment (top of the page). Press + New attachment. Add attachment. Press Filename, enter filename, and press ok. Press ok. Repeat to add more attachments.
  9. Press the icon to save (floppy disk). The form is saved as a draft. You can continue to register the form later.
  10. Press Send (top of the page). Press Send in to send the form.

To edit a registered remuneration in the form, press the remuneration, edit, and press OK.

To delete a registered remuneration in the form, press the remuneration, press the rubbish bin, and press OK in the message.

Add attachment in the app

Add attachment by taking pictures with the phone’s camera

  1. Press attachment in the menu of the travel expense claim or expense reimbursement. You can also add attachment in an expense post.
  2. Press “new attachment”.
  3. Press “take picture” to take a picture with the phone’s camera.
  4. Reply ok to “DFØ want access to the camera”.
  5. Take the picture. Press “Use Photo”. Or press “Retake” to take a new picture.
  6. Press filename. Enter name and press ok.
  7. Press ok. The attachment is saved.

Add attachment by uploading a file stored on the phone

  1. Press attachment in the menu of the travel expense claim or expense reimbursement. You can also add attachment in an expense post.
  2. Press “new attachment”.
  3. Press “select existing”.
  4. Select the desired file. On iPhone it is only possible to select pictures which are on the camera roll. On Android you can select between all the files on the phone.
  5. Answer ok to “DFØ wants access to your pictures”.
  6. Select file.
  7. Press filename. Enter name and press ok.
  8. Press ok. The attachment is saved.

Two tips

  • You can add multiple receipts next to each other and take a combined photo.
  • You can open a PDF-file on the phone and take a screenshot of it.

Delete an attachment

  1. Press the attachment.
  2. Press the icon to delete (rubbish bin).
  3. Press ok.

Delete an attachment in an expense post

You must delete the entire expense post; you cannot delete only the attachment.

  1. Press the expense post.
  2. Press the icon to delete (rubbish bin).
  3. Press ok.

View an attachment

  1. Press the attachment. The attachment is displayed if it is a picture.
  2. If you cannot see the attachment, press the icon to download (downwards arrow).
  3. If the phone does not select an app itself, select which app you want to use to download the attachment to. The attachment is displayed.
  4. Press Back to DFØ.
View payments in the app

View what you have been paid and when

  1. Press payment in the main menu.
  2. Press travel and expense.
  3. You will find travel requests, travel expense claims and expense reimbursements which have been paid out here. You will also see which amount has been paid and when.
  4. Press the one you want to display. The payslip is displayed. It will always be the last version of the payslip which is displayed.

View what is about to be paid

  1. Press the travel expense claim, expense reimbursement or travel request you want to view.
  2. Press the icon for more (three vertical dots).
  3. Press “Show payslip”. A preview of what you will be paid is displayed.

This is how you use the web solution Betalmeg

The language setting is controlled using the “no | en” links in the top menu.

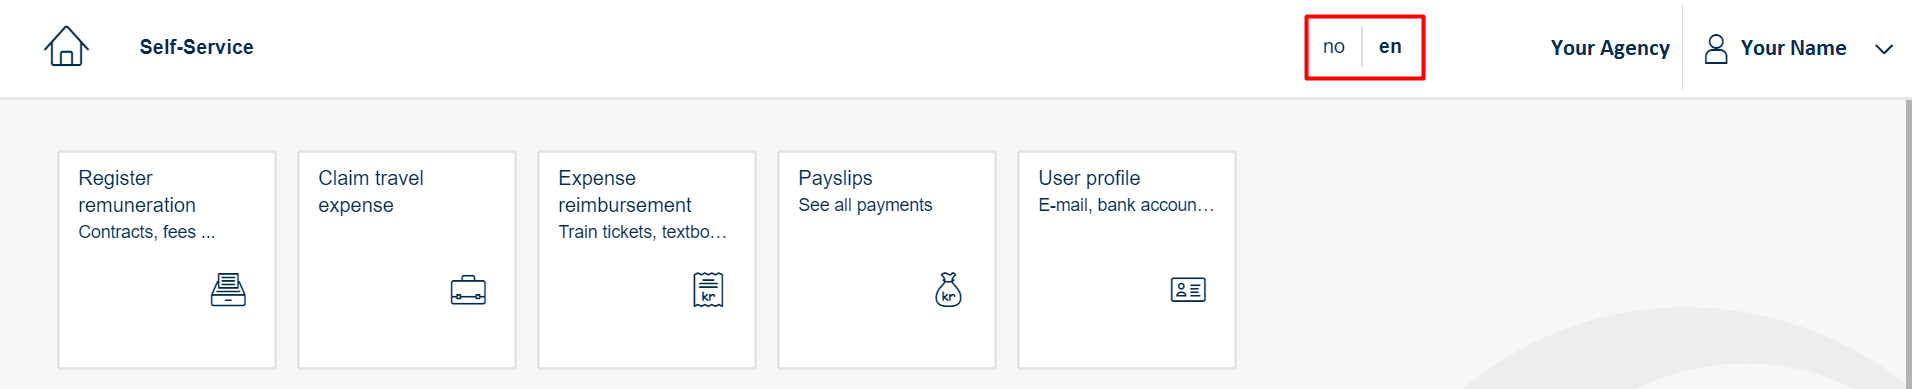
Change language to English

After you log in to Betalmeg, you can change the language to English from the main menu. You will find the language selection on the upper right hand side, next to the name of your employer.

Answers to frequently asked questions

Do I have access?
  • To be able to use the solution, the agency you have performed a task for must have given you access.
  • You should have received an email with information about having received access.
  • Contact the agency you performed the task for if you have not received this email or have questions about access.
Which wage type should I use?
  • Are you not sure of which wage type to use? Contact the agency you performed the task for.
Which date should I use?
  • Select the date the amount was earned or the date you paid for what you are claiming refunded.
  • If the matter concerns several dates, select one of the dates.
  • For some wage types the date will automatically be changed to the next payment date when the form reaches approver.
Must I attach receipts and attachments?
  • If you are wondering which attachments you must attach, contact the agency you performed the task for.
  • It is not a requirement to save paper receipts after you have uploaded them as attachments
  • We still recommend you save original receipts until you see that the amount has been paid out to your bank account.
Should I add comments or references?
  • You can add contact person, case number, or other information in the comment field.
What do I do when I receive something in return?
  • You will get a message by email if a travel expense claim, expense reimbursement or remuneration form is returned to you.
  • You must edit the travel expense claim, expense reimbursement or remuneration form, and send in again.
When will I receive payment?
  • After your claim has been approved, it will be paid out on the next payment date.
  • Travel expenses and reimbursements are usually paid out once a week.
  • Remunerations are either paid out every other week or monthly, depending on what the agency has chosen.

Are you in need of assistance?

You will find a lot of help when you log in. In Betalmeg and the DFØ-app you will find a chatbot named Lara. Lara will give assistance and guidance on how to fill out remuneration forms, travel expense claims and expense reimbursements.

You find Lara when you click on the question mark on the site. She will for instance answer

  • How to fill out travel expense claims or the remuneration form
  • What a fee is
  • What public rates apply
  • How to send in the form

Lara is still in training. The more questions she is asked, the better Lara can help you and others in the future.

If Lara does not know the answer to your question, you can be transferred to an employee at our customer service centre.

You can also phone us on 400 18 659 or send us an email at lonn@dfo.no.

Updated: 23. February 2023

Contact

Do you have questions about the content of this page?

Contact our customer service centre

• email: lonn [at] dfo.no (lonn[at]dfo[dot]no)
• telephone: (+47) 406 34 021

Did you find what you were looking for?

No

We are sorry!

Your feedback is anonymous and will only be used to improve our website. If you want to get in touch with us, please call or send an e-mail.