How to register a request for absence in our self-service portal.
You can register absence and send absence requests for approval. The approver can return the request to you if it needs correction.
You can edit or cancel the request at any time. Additionally, you can cancel a request that has already been approved or sent and not been processed.

Click “Requests for absence” to register an absence request. You will find this under “Time” in the self-service portal.
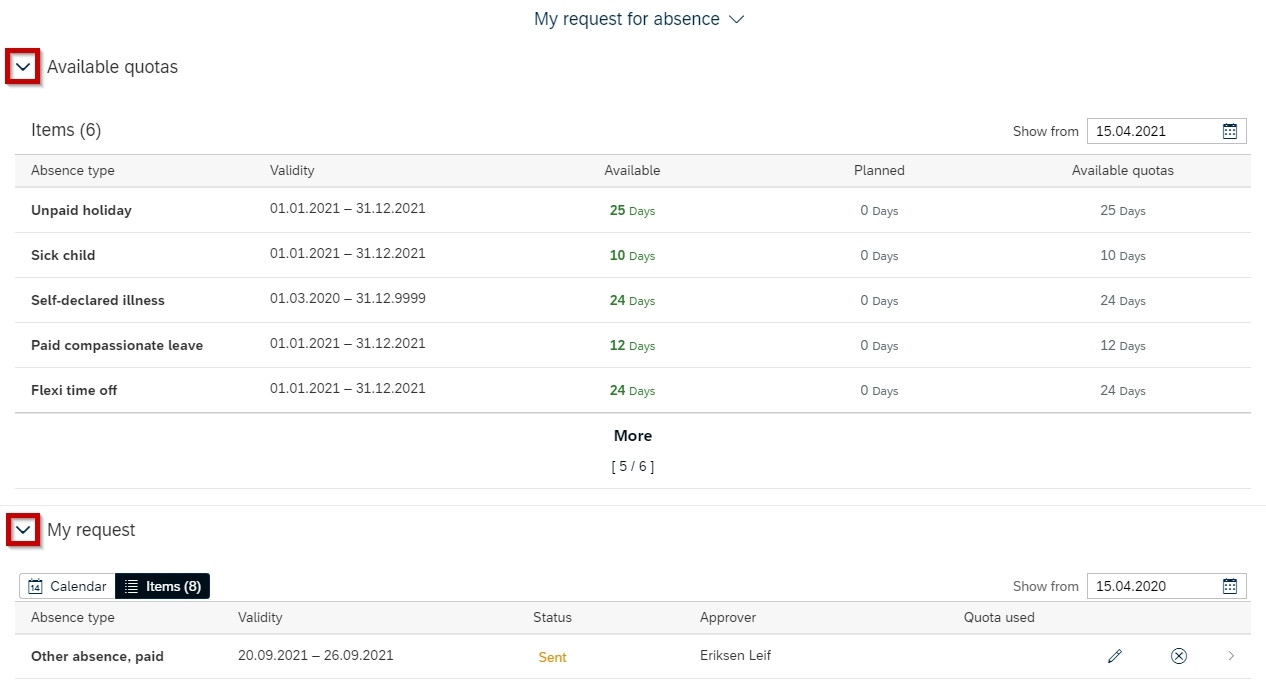
Here you will see an overview of your quotas with the remaining amount of days available, and planned absence.
Under “My requests” you can see all requests for absence and the status of the requests.
You can change the display by clicking the marked arrows to show or hide information.
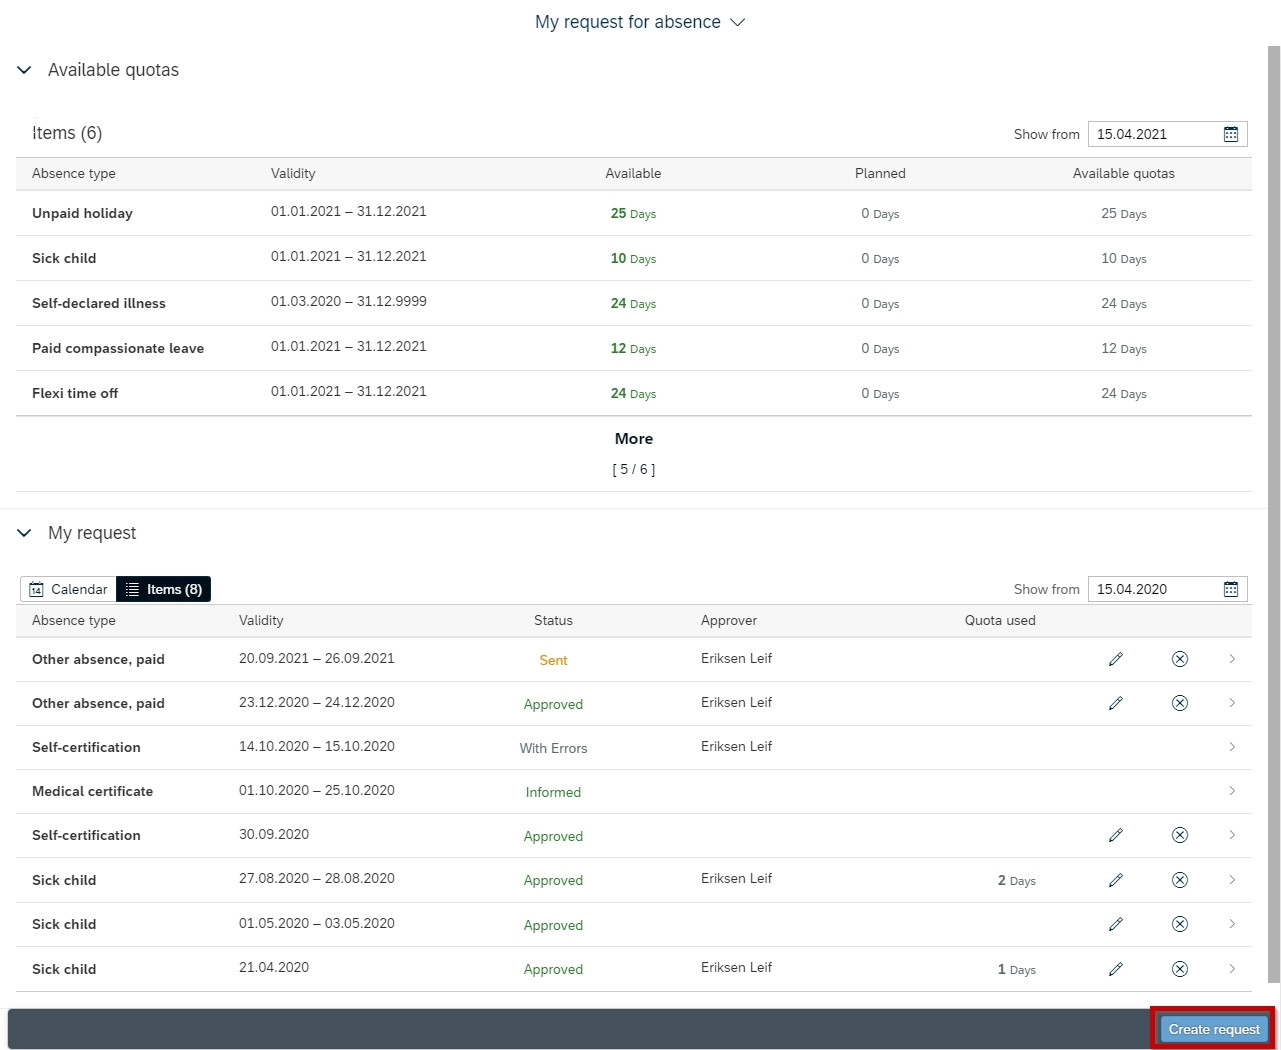
Click “Create request” in the bottom right corner to make a new absence request.

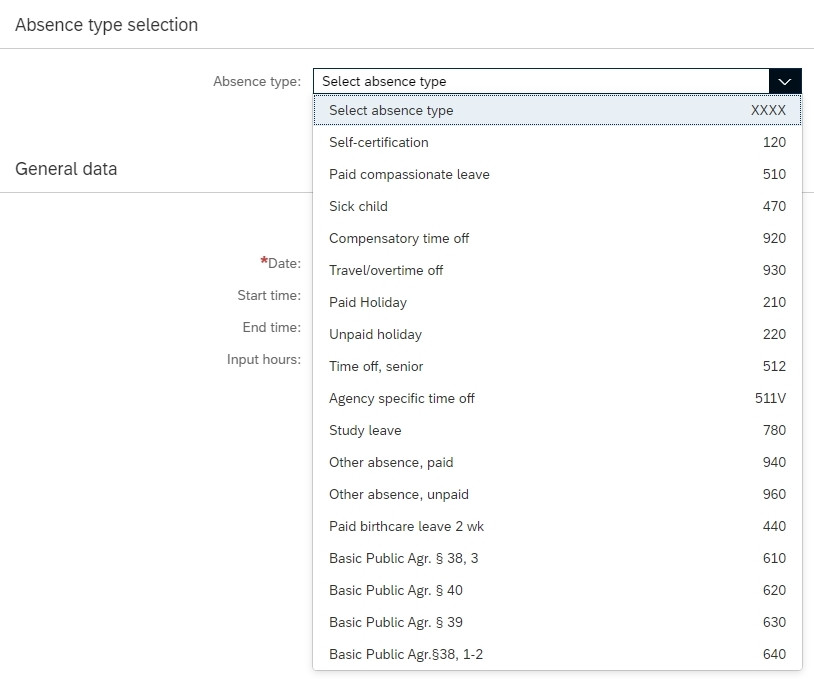
Select the absence type in the field for “Absence type”.
When the absence type is selected you will be able to see the remaining days of the quota, and a description of the absence type.
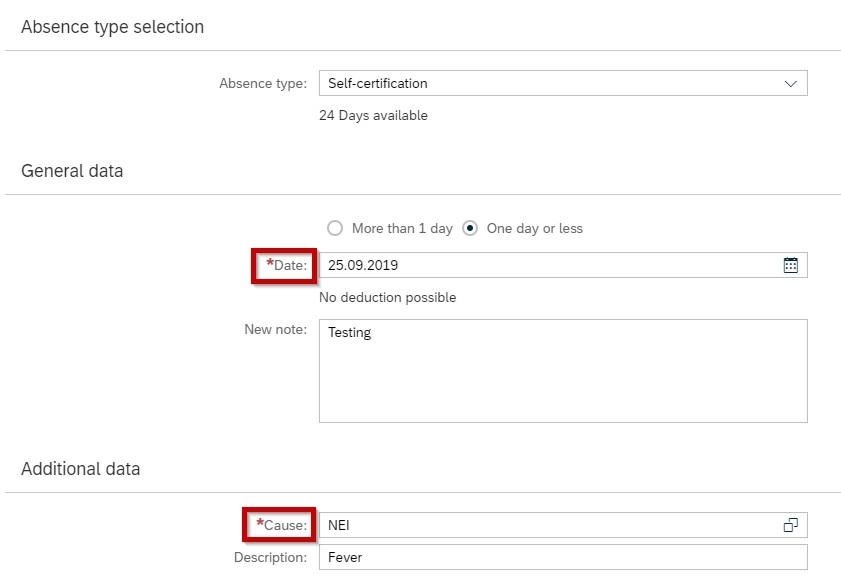
Enter date and time if applicable.
You can enter information about the absence in the “New note” field.
When selecting self-certification, it is obligatory to inform if the absence is work-related or not in the “Cause” field.

Click “Save” to submit the request. The request will be sent to approver. Click “Cancel” to cancel your request and discard the changes.
Rejected requests for absence

You will see the rejected requests under “Requests for absence”.
You must edit or delete these requests.
Click the pen to edit the request or click the “X” to delete it.
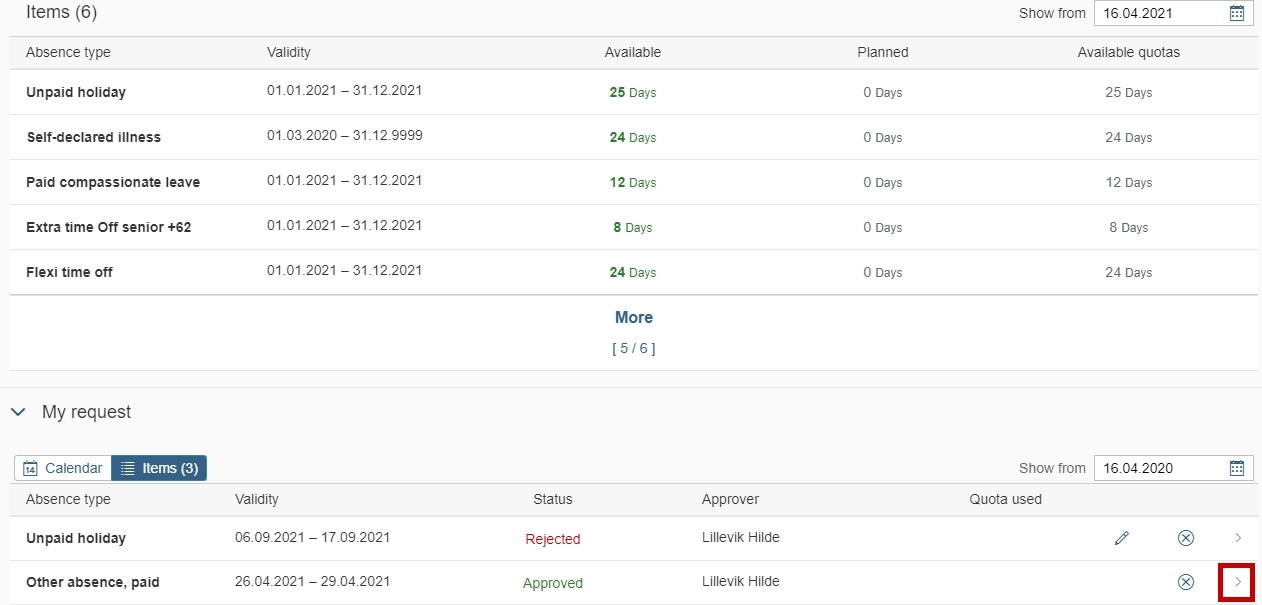
You can view comments by clicking the arrow.
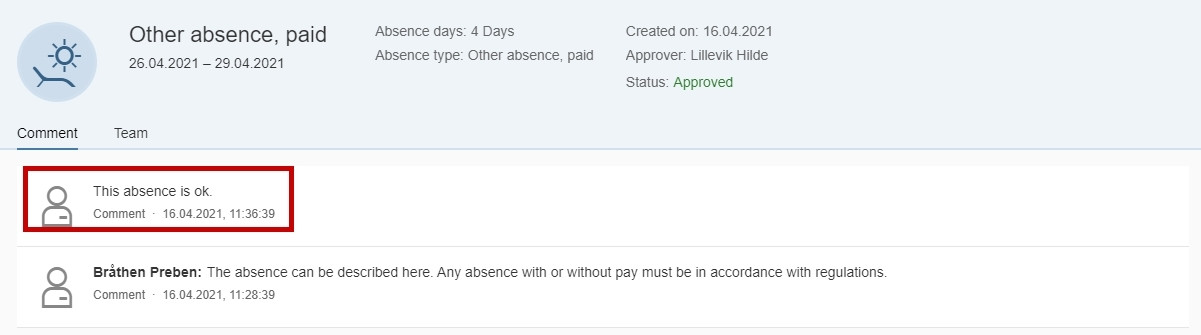

In the next picture you will see more information regarding the absence, including comments from the employee and the approver.
Edit or delete a request for absence

Click the “X” to delete a request that has been sent or approved.
Click the pen to edit the request.

If you have opened the request, you can edit or delete it by clicking “Edit” or “Delete” in the bottom right corner.
Error messages
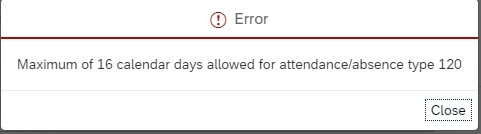
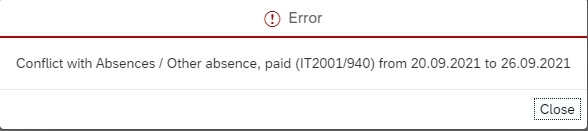
In some situations, a conflict may arise in the system, and an error message will appear.
In this case, you need to edit absence or attendance.
You may have to contact a professional user in your agency if the absence or attendance need to be processed manually.
For approver 2
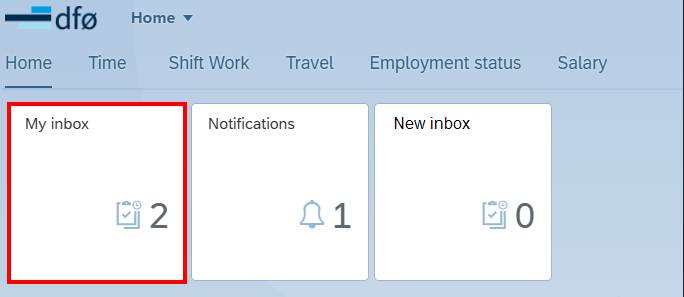
Absence requests sent from employees will appear in your inbox.
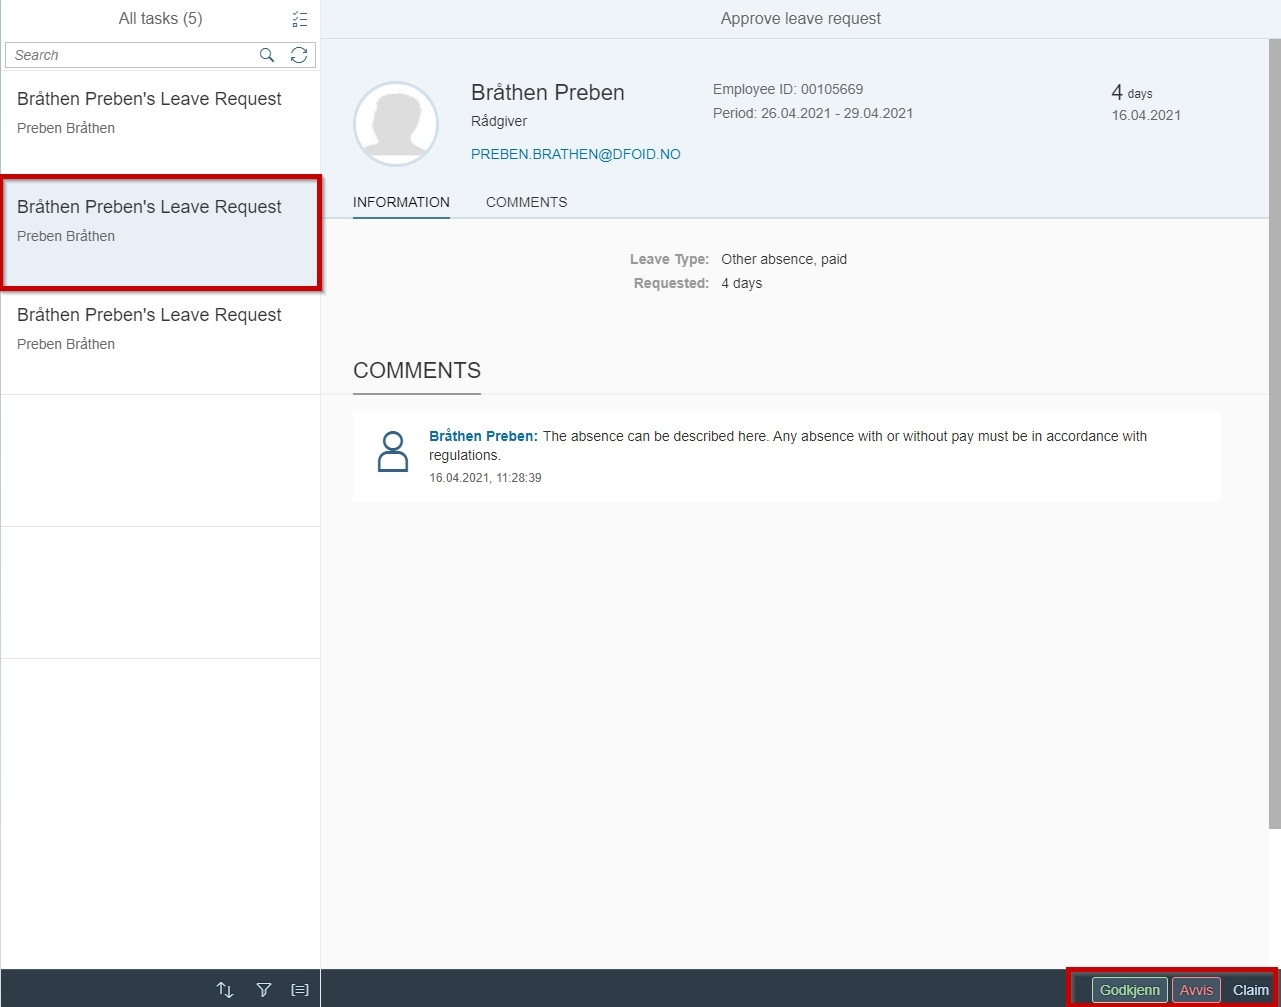
You can find the request in the list of “All tasks”.
Click the applicable request to see the different alternatives for processing.
In the bottom right corner, you can select “Approve”, “Reject”, “Reserve” or “Forward”.
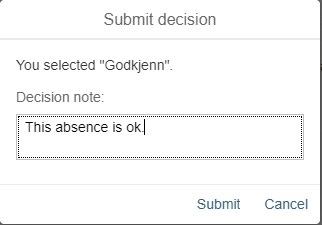
When selecting “Approve” or “Reject” you will be able to enter a comment.

Contact
Do you have questions about the content of this page?
Contact our customer service centre
- lonn [at] dfo.no (lonn[at]dfo[dot]no)
- (+47) 40 63 40 21